The Innovator
Contents
The Innovator Preview
The preview is an email in Mailpoet named “The_Innovator_Preview”. This email is never sent, it’s purpose is to allow the “Content Uploader” to display a preview of the current newsletter.
“The_Innovator_Preview “must be updated manually for each issue.
- Locate the” The_Innovator_Preview” email.
- Select edit
- Change the edition and the date

- Edit the custom shortcode, ‘article list’ to the current NLID. The NLID is as follows: “NL”+0#(edition)+## (year)
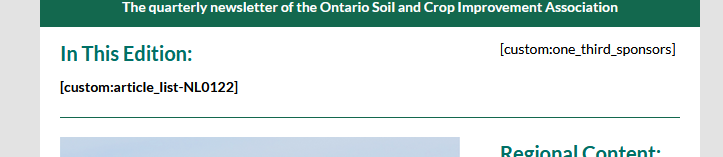
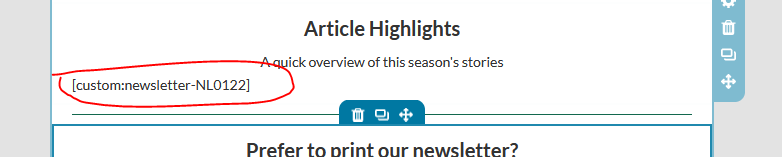
- Edit the custom shortcode, ‘newsletter’ to the current NLID. The NLID is as follows: “NL”+0#(edition)+## (year)

- Click “Next” in the bottom right .
- On the next page click “Save as draft and close”
The Innovator Current Issue
The current “The Innovator” issue is an email in Mailpoet named “OSCIA The Innovator – month year.
“The_Innovator “ current issue must be updated manually for each issue.
- Locate the previous ” The_Innovator” email.
- Duplicate this email and rename it to the month and year of the upcoming issue.
- Select edit
- Change the edition and the date

- Edit the custom shortcode, ‘article list’ to the current NLID. The NLID is as follows: “NL”+0#(edition)+## (year)

- Edit the custom shortcode, ‘newsletter’ to the current NLID. The NLID is as follows: “NL”+0#(edition)+## (year)
- Click “Next” in the bottom right .
- On the next page click “Save as draft and close”
Articles for “The Innovator” are usually created using the “Content Uploader”. The “Content Uploader” automatically assigns the required categories for an article to be picked up by Mailpoet. These categories are article, newsletter, and the current newsletter code. The current newsletter code is in the format of “NL”+issue+year. The first issue of 2022 would be “NL0122”.
An article could be created directly in WordPress by creating a post and assigning the appropriate categories manually.
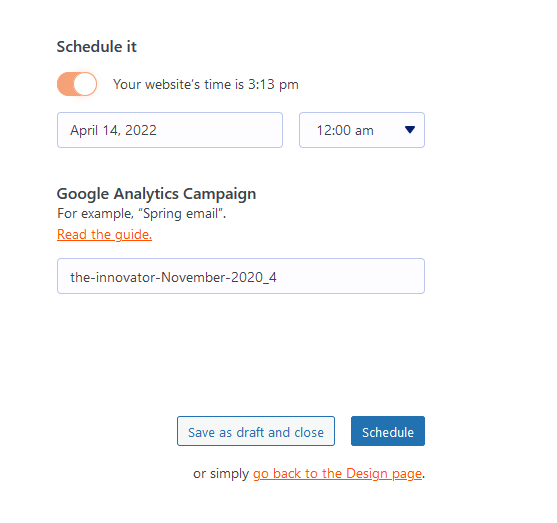
Schedule “The Innovator”
- Select the issue of “The Innovator” that you would like to schedule and select “Edit”.

- Click “Next’ in the upper right.
- On the next screen select ‘Schedule It’ and set a day and time and click the “Schedule” button.